Colorhue dye by Ginny Eckley is safe, non-toxic and sets instantly on protein fibers: there is no need to heat or leave it to sit for days and you don’t need a mask or special equipment when mixing up a batch of dye. This makes it a fantastic dye for impatient people like myself! But you do need to prepare the dye in advance by diluting it with filtered or distilled water. Once you get a set of diluted dyes mixed up you can do several projects (about 15 scarves for my set of bottles) before you have to stop and mix more, so again, great for the person who likes jumping in quickly and seeing the results fast.
You’ve hopefully seen my post about the fun I have been having with Colorhue instant set dyes for protein fibers. I’ve discovered a few things (finding out the hard way) that make the prep stage easier so I thought I’d do a little tutorial about how I mix them to get them ready for use. Tomorrow I will be posting a tutorial on how to make a scarf with the “bread bag” method (which is what I used for most of the things I have posted).
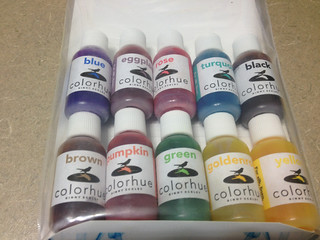
First off, you’ll need to acquire some Colorhue. You can buy them many places, I got mine from a vendor at SAFF and paid the full suggested retail price of $40 for a ten-pack sampler. That same Colorhue Sample Pack is available at DharmaTrading.com for $35.99 plus shipping (which is also where I buy my pre-hemmed silk scarves — really if you are a dyer or want to try it Dharma Trading is the place to start, they are cheaper than anyone else I know of and have the best selection of dyes and dyeable fabrics). The sampler pack has half an ounce each of the ten colors that come prepared, you can also mix to get your own shades. Please note that there is not a red by default, but these dyes work on the CMYK color system not RGB so although you may have learned that red is a primary color, that’s not the case here. You can make a variety of shades of red by mixing yellow with rose (really a Magenta for the purposes of CMYK). I do wish they’d go ahead and come out with a red, though. It’s just annoying to have to mix it up all the time as it is a color I use often in my work (I haven’t shown you those scarves yet, I will soon).
In my experience the sampler pack will dye at least 40 scarves plus assorted other items. It’s a good value if you want to have every color, but it is more economical to buy larger bottles (available in 2 and 8 ounces) if you find you use certain colors more than others. I plan to do that when I start running out of my favorites.
*Apologies: this is my first time photographing a tutorial with my left hand. It’s a little harder than I had thought so some of the photos are a bit blurry. I’m sorry! I think I will use a tripod in the future but we’re still unpacking from our move to Austin and I couldn’t find it. 🙁
Here’s what the sampler pack looks like:

Now the directions (on the website, it doesn’t come in the package) say to use 15-20 drops of dye per 1/2 cup of water (4 ounces). I’m far too lazy (and shaky) to count out drops individually. I use glass eye droppers (also from Dharma Trading) and use one full eyedropper per ounce of water. I think this is a little bit more than their 15-20 drops but not by much. This comes out at a medium level of saturation and one that I am happy with. For pastels, use one eyedropper of dye for every two ounces of water.

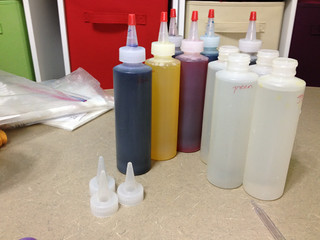
You’ll need something to mix and store them in. You could just use cups or anything with a lid really, but I find it is much easier to use little squirt bottles. The demo I saw when I bought them used sports-capped water bottles and dumped the whole bottle of dye into a 20 ounce bottle of water. I couldn’t find any water bottles the size I wanted so I found these little ones with spouts. (Again, from Dharma Trading. I got 6 ounce bottles because apparently 6 oz is not a popular size with dyers so they had them on clearance. Then I also got some more 6 oz bottles from Wilton on clearance at a big box craft store so I have spare bottles for mixing colors in.)
You don’t need a fine squirt tip for most dye techniques, but when doing a graffiti-style direct application it helps, so I can use these bottles for every method I’ve tried so far without needing to change to a different applicator. If you are doing immersion dyeing obviously you will want to have your dyes in a bigger space to immerse the fabric but I find this very easy for the mixing stage and plan to then dump the mixed solution into the other receptacle for the bath. That way I can mix up more dye than I need for a specific dyebath and still have them handy for other uses in the future. If you are doing large dye baths (for instance if you use the whole bottle in one bath) you may not want to pre-mix, you’d add the dye straight to the bath instead. I haven’t done this yet so have no idea what the water to dye ratios will work best in that situation. I’ll let you know when I find out.
I strongly recommend that you label each bottle with a permanent pen or marker — not only does the sample pack have two shades of blue and two shades of yellow that would be very hard to tell apart with the naked eye but also the purple and black look very similar when in the squirt bottles.
Oh yeah, before you start mixing you might want to put on gloves, an apron, or black clothing. Although Colorhue only dyes protein fibers and rayon in saturated shades it *will* dye cotton and other fibers a bit too, so it can stain your clothes and will stay on your hands and fingernails for a few hours at least. I don’t make a huge mess but I also usually wear black when dyeing so it’s only my hands I have to worry about and I really don’t care if they get dyed. [I really am planning to use Colorhue the next time I dye my hair, so blondes might need to watch out for that too!]
I filled the bottles almost to the top with filtered water. In my previous batches I used bottled water, but it doesn’t matter a whole lot except that you will want your water to be consistent, the minerals in water can alter the shade of dye subtly, so once you pick something it’s best to stick with it at least for the whole batch. I left a little room at the top of each bottle because I was going to add 6 eyedroppers’ worth of dye to each bottle. (My other bottles have ounce markings so it’s easy if you only want to do 2 or 4 ounces instead of 6 at once, or you can just eyeball it.)
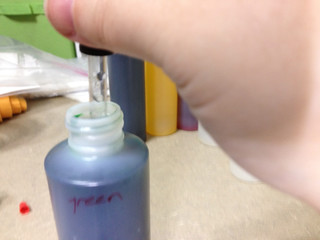
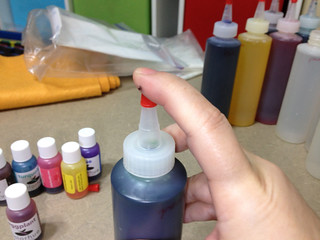
It’s fairly easy from this point. Just load up your eyedropper:
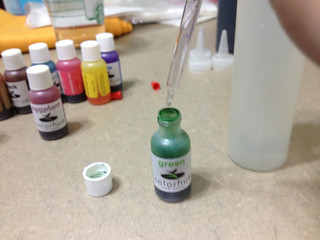
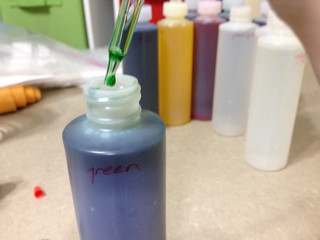
Then add the dye into the water:

You’ll notice that there is some excess dye clinging to the eyedropper. Don’t worry, it’s not stained or ruined.
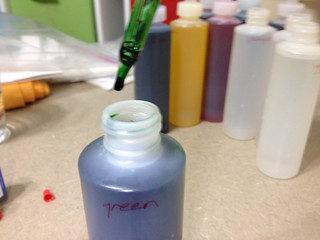
Because a bit of the concentrated dye clings to the glass, you’ll want to add that to the bottle as well so you don’t waste it. When you have finished adding in the dye, dunk the eyedropper into the bottle. Swish it around a bit to remove the dye from the outside of the dropper, then fill and empty the eyedropper into the bottle a few times to get the dye from the inside.
Because you are rinsing the inside with diluted dye, it won’t rinse clean. But at least you’ll have used up the very concentrated dye.
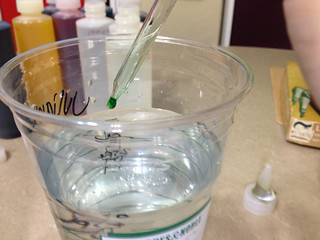
Now you need to clean out the eyedropper before moving on to the next color. So repeat the procedure with plain water.
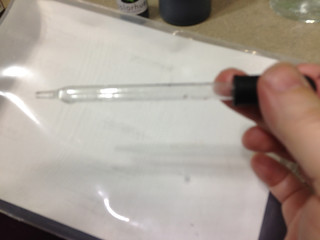
Hold the eyedropper against a white background to be sure you’ve gotten all of the color out and it is clean for the next shade of dye. (Sorry this is really blurry.)
In the home stretch! Now we need to put on the cap and give it a little shake. If you are using a larger container you could just stir it a bit with the eyedropper before you clean it or use a straw or spoon to stir. (Remember, once something has been used for dye it should never be used for food; even though this is non-toxic, it’s a good habit to be in.)
You can easily see if you forgot to shake: even one little swish will usually leave some stuck in the spout. This also makes it a little bit easier to tell the colors apart without having to read the label (unless it’s those pesky blues and yellows that look almost exactly the same in the bottle but look quite different on fabric).

And now you are ready to dye!
Come back tomorrow for my tutorial on “bread bag” dyeing.
Any questions?