Welcome, Crafty Quickies guests and my loyal readers. As my contribution to the Crafty Quickies (crafts in 15 minutes or less) series, I present a tutorial on how to use the “bread bag” dye method with Colorhue instant set dyes (yes, really, a dye that does not require heat setting or lengthy waiting!) to dye a silk scarf. You may want to see my tutorial on how to mix the dye solution and my examples of several scarves and other things I have dyed with this method. Colorhue works best on protein fibers and rayon, other fibers will have a much less saturated effect.
[Note: this was my first day of trying to photograph a tutorial with my left hand, a few of the pictures are blurry. I apologize. I know I will need a tripod in the future but as we’re still unpacking from our move last week I just can’t find it yet.]
“Bread bag” dyeing (a form of low-immersion dyeing) is where you take some fabric and scrunch it up into a plastic bag, then apply a small amount of dye to the exposed parts of the fabric. Squish the fabric to ensure that the dye discharges (gets absorbed by the fabric), open the fabric up, scrunch it again with different bits showing and add dye again. That’s really all there is to it, but I’ll walk you through every step. Oh, and I don’t use a real bread bag as I like something a little more sturdy; I use a freezer bag because I know I can really squash it up without worrying about it springing any leaks. I’ve used the same bag over and over for about 20 projects so far and it’s still going strong.
Warning: These dyes really do set instantly. You may want to wear protective gear in case of any spillage: while the dye is best for protein fibers it will stain other fabrics and even light hair. (My cat loves the smell of these dyes for some reason, I’m sure one day she is going to wind up with a purple belly. On the other hand, I am going to use these dyes the next time I dye my hair blue — it would sure beat sitting under the dryer for two hours or leaving the dye on overnight!)
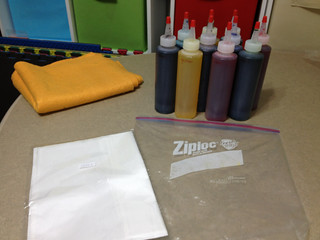
So let’s get started. You’ll need to gather your supplies: Pre-diluted Colorhue dyes in 3-4 colors (ideally in a squirt bottle or something where you can easily control where it pours), a silk scarf or other protein fiber fabric to dye and a strong plastic bag. Optional supplies if you’re impatent: synthetic chamois (you’ll want a few), an iron, an ironing board. (I get my scarves from DharmaTrading.com and my chamois are a Sham Wow knockoff from the dollar store.)
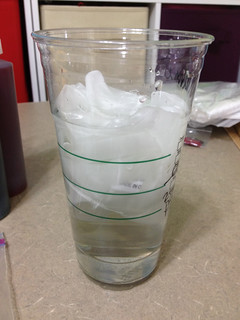
First, you’ll need to get your scarf thoroughly wet. You can do this in the sink but I had some water on hand already.
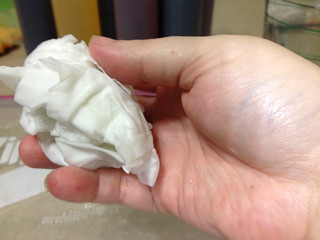
Now wring the fabric out thoroughly. Squeeze out as much water as you can. Mostly so you don’t drip on the way to the bag, especially if you are carrying this from the sink. (Ask me how I know 🙂 ) Also I find you get a more interesting texture if the fabric is wrung out. If it’s very wet the dye gives more of a “wash” effect, which can be lovely too. (At least this is my theory as to why I get different effects, I have not conclusively proven it. I could be wrong. In any case it won’t hurt to wring it out.)
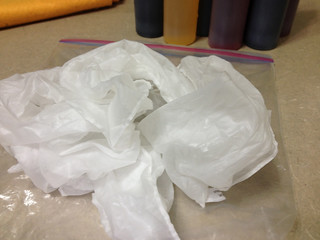
Now open it all back up.
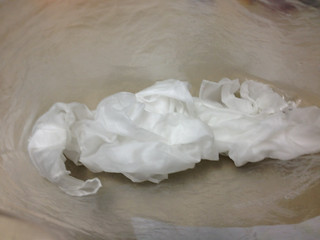
Now be a little more deliberate. Scrunch up the fabric along the length, I usually grab about a handful and scrunch, then another. You want it to be fairly even all the way along but you really don’t need to fret over it. Bread bag dyeing is all about serendipity so don’t overanalyze any part of it. 🙂 Think of this as a very haphazard accordion fold: you’re just trying to get some parts to stick up on the top, some parts to poke out on the bottom and the rest to be in the middle. This helps each color be more or less evenly distributed throughout. If you choose to not scrunch you’ll get larger puddles or pools of one color rather than lots of little ones.
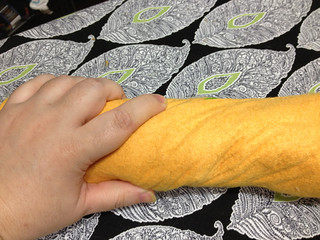
Once it is scrunched, place it gently into the bottom of your bag.
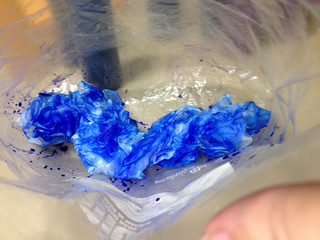
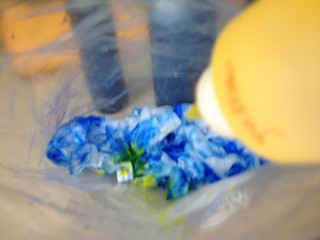
Now the fun begins! Squirt or pour a little dye onto the top of the fabric. Not too much, you don’t want the fabric to be swimming in dye just yet. You just want enough dye to cover the exposed area.
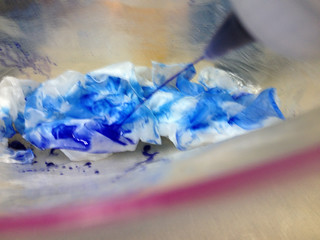
I think this is enough dye for the first bit (like I said, some photos are blurry, sorry):
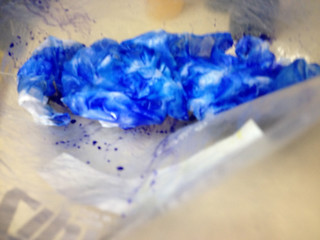
Look through the side of the bag, you can see there’s a lot that does not have any dye on it yet. You’ve only gotten started.

Squish it from the outside just a little to pick up those stray drops of dye. Scrunch, dye, squish — that’s really all there is to it.
Because there’s no excess water to allow the dye to move around inside the bag, this first time it’s a good idea to reach in and gently turn the fabric over. Don’t undo your scrunching as you turn it. Now you can see the fabric’s white belly. Just like my cat’s. It’s crying out for some dye, don’t you think? (The fabric that is, not the cat. Although maybe….;) )

Add more dye until this side, too, looks fully colored. Don’t worry if there are some white bits showing, they’ll get taken care of later.
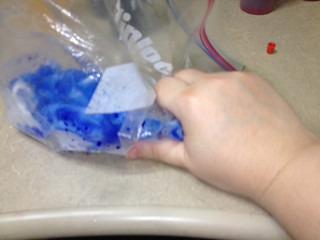
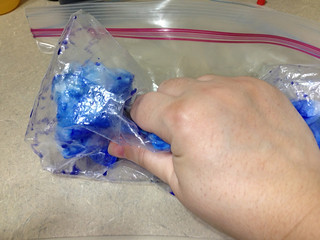
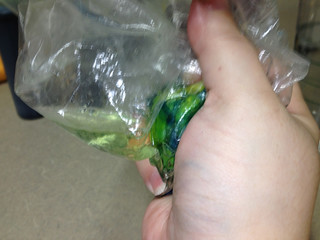
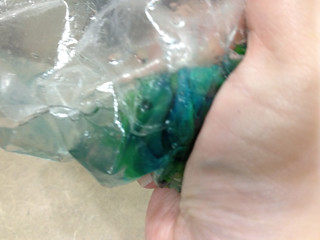
Grab the fabric from the outside of the bag and give it a squeeze. You’re trying to get any loose dye to go on to and get absorbed by the fabric. Just give it a few squishes and also move it around so that it picks up any droplets of dye clinging to the side of the bag.
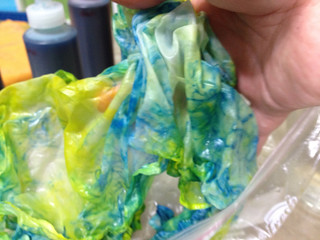
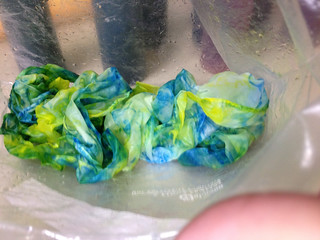
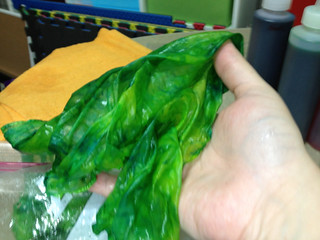
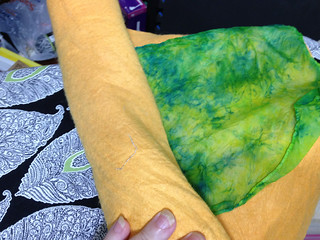
Take the fabric out of the bag. You’ll want to open up the bits that were previously scrunched. What looked like it was mostly colored before now shows vast expanses of white. You could stop here if you wanted to, but with all those white areas I just want to have at ’em with more dye 🙂
Scrunch the fabric again. You’re aiming to have more white bits sticking up on top than already colored areas. Like this:
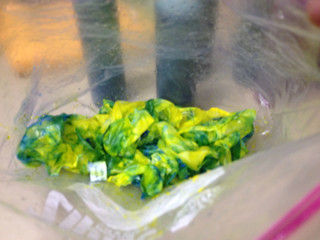
Go on and add your second color. I’m using yellow.
Once again, cover the whole top with the new color.
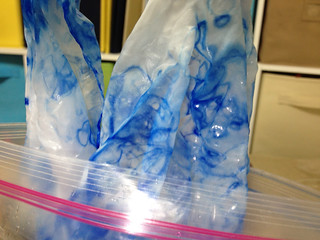
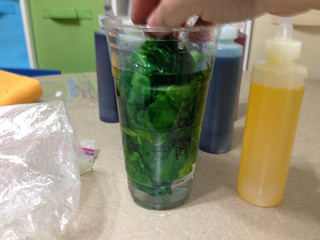
This time you don’t need to turn the fabric over. You’ve got enough liquid in there and also unless you were really overachieving, you didn’t try to get a lot of white showing on the bottom, just the top. So it’s time to squeeze. From here on, when you squeeze you want to keep massaging the fabric until the water is mostly clear. It doesn’t usually go all the way to clear but you want it to be very pale. You may have to squeeze the whole scarf down into one corner just to be able to see the excess water at this stage.
You can see the excess water on the left side of the bag. That’s what I mean by “mostly clear”.
If the water is mostly clear that means that the dye has been absorbed. If it’s not turning clear you have a few options: wait about a minute to see if it absorbs naturally, keep squeezing to try to get dye deeper into the bunch, and/or open up the fabric a bit to allow contact with fabric that does not have as much dye. I try to avoid the latter if I can as it messes up all that artful scrunching. Also beware that somewhere out there is a point at which the fabric cannot absorb any more dye, at least not without drying it out and rewetting it. If the excess water just won’t clear up for you, you may just have too much dye for that fabric. Pour out the excess (I usually pour it into an empty water bottle — hey that dye is still good and can go onto another project) then rinse the piece, dry it (see steps below) and if you want you can wet it down and start adding color again. So far in about 20 pieces I’ve never had the fabric not accept more dye on the second time around, so you should be fine. (Maybe if you don’t dilute the dye this could happen. I haven’t tried it.)
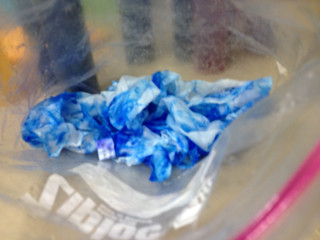
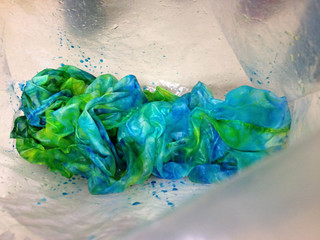
Now it’s time to pull the scarf out of the bag again. You may be thinking that it’s all dyed by now but probably not: the scrunching always keeps parts of the fabric protected so they don’t get that round of dye. Mine still has plenty of white bits showing:
Again, you could stop here. There’s absolutely nothing wrong with white being part of the design. But I’m a glutton for punishment, I generally do 3-5 rounds of dye. So it’s time to scrunch it up, once again targeting the white areas to be hit by the next lot of dye.
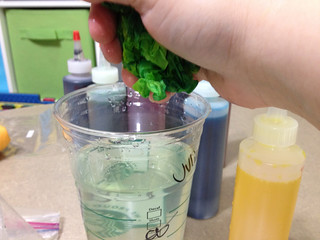
It’s time for the third color. I used turquoise, which doesn’t show up that well since I already have a darker shade of blue. But you can see that it does get more color:
And squeeze. The water seems even clearer than the last round. The dye can get absorbed at any point when it meets fabric that can hold more.
It’s important to remember at this point that the dye always looks a lot darker when it is wet. I had planned to add a bit of dark green at that stage but I really liked the limey shades and didn’t want to risk making them darker. (In retrospect it would have been fine, but I’m still learning how to gauge how the scarf will look when dry from the wet version.) Instead I decided to add another round of yellow. I scrunched it up as usual, but then when squeezing it I reached into the bag to open the fabric up as much as I could so that the yellow would hopefully get into any white spaces that may have been left. You might think that adding anything would make the whole piece darker but I find that adding a light color near the end just strengthens the light areas and covers any remaining white without making the piece darker over all. See for yourself:
Before adding the yellow:
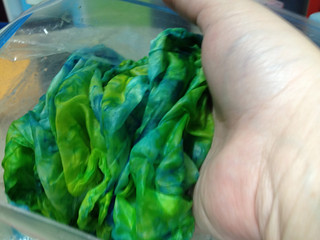
And after:

Some of the brightness of the second photo might be because I fixed my clip-on light to shine into the bag better. But I do think that the second picture has a lot more yellow in the tones overall. Maybe I’m just high on dye fumes… on no wait, there is hardly any odor to the dyes at all, only my cat seems to be able to smell them (she usually come to watch, I have no idea why she is so fascinated with these dyes). Anyway, I liked the effect, and I knew that the white was now all covered with color. I decided to add a touch of that darker green after all. But I won’t bore you with the pictures. As I’ve said, you can stop at any point, or you can keep going. I’ve done as many as 7 rounds of dye in one go, without drying it out in between. So as long as your water is mostly clear at the end of the squeezing part you can always try to add more. I don’t use more than 4 colors though as I fear they would blend too much and get very muddy. You can always try it and see! I just think that other dye methods would be better if you want to have more than 4 shades clearly distinguishable.
After you’ve finished squeezing, it’s time to take it out of the bag for the last time.
At this point you could call it all done. With the bread bag method there is not a lot of undischarged (unabsorbed) dye left, so you’re not going to have much run-off when you wash it the first time. I don’t usually rinse, but this time I had water handy anyway, so let’s go for it.
When I wring it out I can see that there is a little tint to the rinse water, meaning that I did have a little bit of dye come out. But actually some of that tint was already there when I had used the water to rinse out my eyedropper when I was mixing the dye solution. In any case, there’s not a whole lot of excess dye to worry about, as you can see. That’s why I don’t generally do this step.
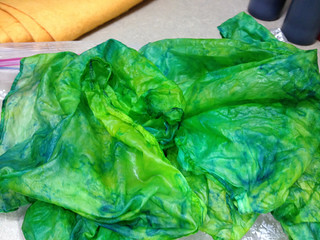
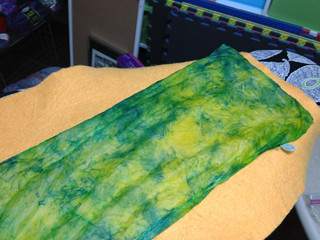
And voila, this is what the scarf looks like rinsed but still wet:
At this point I’m at the end of my 15 minutes for the Crafty Quickly challenge. You can just stop here and hang the scarf up to dry, or throw it in the dryer if the fabric allows. I’m far too impatient for that, I know that it will look different when it’s dry so I hurry the process along. But, as I said, this is totally optional. (This part takes 4-5 minutes, tops.)
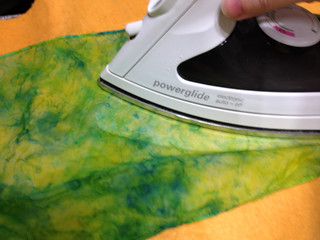
For the speedy gonzales drying method, I grab the synthetic chamois.
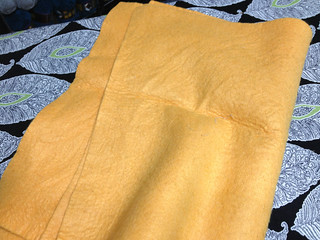
Lay out the chamois on your ironing board, overlapping just slightly so there are no gaps.
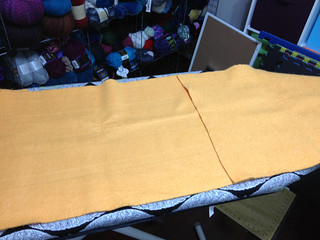
Now stretch out the scarf onto the chamois:
Now roll them up together like a jelly roll. (Now I’m making myself hungry. Or quilty. Hard to say.)
(It’s late at night, I shouldn’t be allowed to blog at this hour. I’ll set it so that you can have this lovely jelly roll imagery around breakfast instead, is that better?)
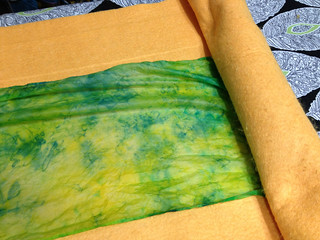
Once it is rolled up, give the whole roll a good twist. Wring it out. The goal is to get the excess water out of the scarf and into the chamois. You don’t have to be very gentle, unless you have some incredibly delicate fabric, because the chamois will absorb most of the force.
Now unroll it, so that the scarf is on top and the chamois is against the ironing board. This is probably the hardest part and it’s somewhat optional. I just like to make sure my ironing board cover doesn’t get wet, especially if I am doing a lot of scarves in one session. But at this point most of the water is in the chamois so it doesn’t matter too much.
If I was smart I would have told you to turn on your iron at the point where you get out the chamois. I usually forget to do that though, so insert a few seconds here for it to warm up. Use the hottest setting your fabric will allow. The ironing will dry the fabric and remove the wrinkles at the same time. Handy, eh?
The colors really get lighter as the scarf dries. It can be hard to see against the dark background of the chamois though and even harder if I was doing it directly on my black ironing board.
Maybe this will help:
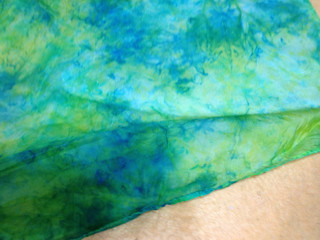
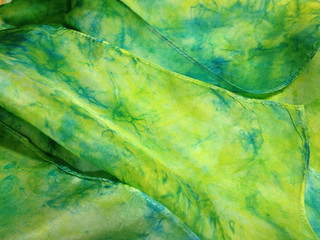
And now we are done! Here’s a pic of the scarf on a white background. Unfortunately I don’t have a light tent so you can’t see the full effect but hopefully you can tell that there is actually yellow showing, or only a slightly greenish yellow, along with blues and greens. Success!
The project took 15 minutes for the dyeing, about 5 minutes for the optional drying method for impatient people and cost under $5. That’s my kind of crafting 🙂
I hope you enjoyed this tutorial. Do come again sometime. 🙂 Meanwhile, if you haven’t been there already, you may want to head over to the Crafty Quickies Roundups for more 15 minute craft ideas over at Moore Craft Time.
Thanks for stopping by! Feel free to give me a shout if you have any questions. I’ve only been playing with this dye for two months or so now but I think I have the bread bag method mostly figured out, so I’ll do my best to answer.
