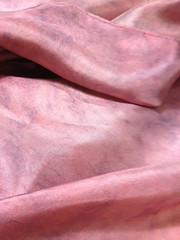
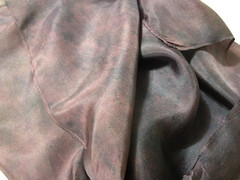
The Painful Truth: Why I Haven’t Been Writing

I’m going to come clean about why I haven’t been blogging. It’s not that I have a dirty secret to hide, but that the topic is difficult for me to talk about, in more ways than one. But last night I was sitting in my wheelchair at a Ninja Panel hosted by Amanda Palmer (@amandapalmer) where she brought up the subject of Kathleen Hannah and her autobiographical film, The Punk Singer. Hannah was known as a brash and bold riotgrrl, with a huge personality. In 2005 she quit music in the middle of a tour, just walked out with the excuse that she had nothing more to say, she’d already said everything she had in her. But that was not the truth. This story was being told in the context of women not being believed or taken seriously, and Hannah had a double dose. You see, she wasn’t out of things to express, she was ill. She’d been fighting undiagnosed Lyme disease (not unlike one of the diseases I have, fibromyalgia) for six years at that point, but with her in-your-face personality, plus the fact that people already brushed her off for being a woman, it was easier to say “I quit” than “I can’t”. No one knew what it had taken out of her to keep up her persona through the disease, so no one would believe it if she said she was too ill to carry on. (Apologies if I have misinterpreted this story, I haven’t seen the film myself, only heard the discussions in the panel last night.)

While this discussion was perhaps one minute in a three-plus hour event, I felt like I had been pierced through the heart. Not only do I know what it is like to have people not believe that you are ill, or that you are as bad off as you are, I also know what it is like to put on a “healthy” persona but also to lose your ability to express because illness has taken it from you. So while this probably won’t surprise too many people — after all I am The Sick Chick — I’m going to be painfully honest about it in ways I don’t usually do anymore. People on the internet usually turn away and don’t want to hear sob stories about sick people, but it needs to be shared and I hope that in the telling I can reach even one person who doesn’t already get it.

I used to be a professional journalist, before I went to law school (which is even more writing). While in law school I became an editor of several official university publications, including the uni magazine and some academic journals and books. My hobby was online games; this was in the day before the pretty graphics, where my flavor of online gaming was just telling collaborative stories, acting out your own character’s part in the midst of other characters and storylines, all in text form. It was just a form of fiction writing. This hobby consumed more than a decade of my life and led to professional writing gigs in game books and magazines, but more importantly it meant I was writing up to 16 hours a day, and that was on my days off!

In 2005, the same year that Hannah quit, I had to give up online gaming of that sort because my hands could not manage to type that much and voice dictation software was not advanced enough for that heavy a usage. I cannot begin to describe the hole in my heart, that I feel even now. I still have nightmares from time to time of seeing text roll up the screen and my hands can’t keep up with responses. I consoled myself then with blogging, which I had begun in 2001. But by 2009 even that was becoming difficult. Keeping up with reading other blogs, commenting, replying to my commenters, etc. was draining. I loved it, I loved the people, but I just couldn’t do it anymore. I was experiencing cognitive decline, for reasons we’re still not sure of, and my mind just couldn’t process everything. Again, another hole was ripped out of my heart. I moved to Twitter full-time (I’d been on since 2007) because my cognitive powers could allow me 2-3 sentences and short back-and-forth conversations — perfect for the tweet — but anything more than that was a challenge.

2012 I tried to take up blogging again. I started well enough, and even wound up writing for other blogs and publications. But within just a few months the anxiety of deadlines and the fact that it was taking me four times as long as my colleagues to produce the same work led to countless hours of tears from frustration, fear, and anxiety. Since none of this work was a real paying gig I felt I had no choice but to give it up or risk triggering a full depressive episode (I am bipolar). Around that time even Twitter became hard to manage and I stopped being on it countless hours per day and it slipped to just an hour or two at most.

August of 2012 led to the lowest points ever in my writing ability. I went on a medication that helped my body but sucked out my mind. It crept up on me gradually, so while I knew I was struggling more and more with memory and writing — even reading my email was out at this point, let alone replying — I didn’t associate it with the medication at first. It got to the point where I had an incredibly important document to produce and it would take over an hour to write a single sentence. There are no words that can truly express the despair I felt, and the anxiety and fear of not getting this document done on time. My brain was more broken than ever before and I couldn’t even communicate with the outside world. I was trapped in my bed by my body having a flare that lasted four months and I was trapped in my head by the combination of my cognitive impairments and this drug that was robbing me of the very last dregs of my ability to speak and write.

Remember, now, that I used to be a professional writer. Maybe then you can imagine how I felt that once again, having lost a great deal of the functionality of my body, now I had lost the use of my mind. Again, there are no words to adequately describe this. I felt utterly useless as a human being and like I would never achieve anything ever again. My dreams of founding a charity to bring the healing power of creativity to other chronically ill adults seemed completely impossible given the state I was in.

Fortunately, we realized the negative contribution the medication was making and I was able to slowly taper off of it over a period of months.  It’s been almost two months now since my last dose and I can feel synapses firing properly again. It is still a huge struggle to write; I have no idea if this blog will ever take off again, but as I will explain in a later post so much of success in the directions I want my life to now go depends on me being able to write consistently and with my former skill. I have a psychiatrist who is working with me to try to reverse the cognitive impairments, but it will be a long road and there are no guarantees. I used to have an IQ of 152, but I am fairly certain that if tested now I’d at best test as average and on my worse days probably below. That is a heartbreak that also cannot be explained in words. It is a howling wind of pain that blows through my soul every day. It is a grief that does not heal.

There is still what I call the invisible wall that comes between me and my words. I *want* to speak out, but so much of the time when I try I feel myself slammed against some invisible barrier that stops me dead in my tracks. I’ve gotten so used to this wall that it doesn’t make me cry every time anymore, indeed I just accept it as part of what I have to go through just to live. But I wanted to let you all know that it is there. To know that when you do hear from me, as I sincerely hope you will more and more in days to come, that it is not easy.

But I also believe in the power of art and writing to heal, so I am going to attempt to tackle this wall with brute force. I hope you will hold my hand through this process and also forgive silences when the wall stops me. I know I need to build my “platform” in order to do the good that I want, in order to establish my charity on sound footing, because without platform there is no support and without support I am only one voice, barely squeaking out a few notes into the wind.

Please bear with me. And please consider helping me with my charity efforts, as I will outline again in my next post (To Crowdfund a Charity or Not?). As inspired by @amandapalmer, I am asking. I can’t do any of this alone. I need you all to help in my journey.

Thanks for your time in reading this. If anything was unclear, or you want more information, please ask. But please also keep in mind that it may take me a few days to reply. My brain can only do so much in any day. Thanks.
Huzzah, I am back!

I am back in the land of the writing 🙂

I had some strange health issues this summer, compounded by my insurance company being every bit as obstructionist as I had been warned about. (I really did not miss that while I was out of the US!) On the bright side I had a wonderful visit from my Australian sister-in-law and got to know many of the local Austin craft stores and I will be starting a new website about Austin craftiness soon.

Sadly, I have had to discontinue writing for CraftTestDummies. The reviews were causing me a lot of stress and taking me about 30+ hours each and since they were every other week that was just too much on top of health problems and international guests and settling in to a new life.

I’m very happy to be a member of the Austin Fiber Artists guild and I will be writing about my adventures with them soon. I’ve got my studio almost set up the way I want it, plus a photography area so I can finally show you more of what I have been working on. I’ve been doing a lot of classes on Craftsy and I am signed up for more classes than I can count locally so there will be a ton to talk about very, very soon. But this week I still have to finish up with a number of medical tests that the insurance company has finally (after many weeks of negotiating) approved and finish organizing my studio.

In the meantime, please check out a recent interview with me on Sara Naumann’s blog:

5 Little Questions: Juliann Krute

Long time, no see!

Life has been so incredibly busy that I haven’t even had time to craft, let alone blog about crafting he past few weeks. It’s actually making me mentally itchy and I am jonesing for a bit of knitting, which I hope to get to tonight.

Moving took its toll on my body, as I sort of expected, plus I am struggling with the bipolar again. You’ll hear more about that soon as I have a big project planned that is inspired by this.
But perhaps the most important reason why you haven’t been hearing from me here is that I am now writing and product reviewing for CraftTestDummies.com  (reviews take me 10-15 hours to produce!) and I am setting up my writing schedule for a soon-to-launch in the UK magazine called Tré La Creativity. The latter is very near and dear to my heart as it is about using crafting to cope with stress and health challenges. (It will be available in electronic format for people outside the UK.)
Plus things are finally moving ahead for turning my “Crafting for a Cause” into a proper, registered charity. So with all of that there hasn’t been much time to blog here and it may be that way for some time. I’m going to continue to do what I can, though 🙂

Thanks for hanging in here with me!

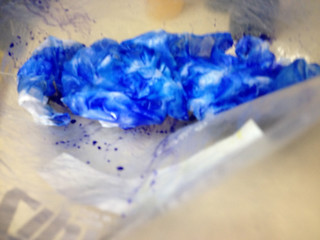
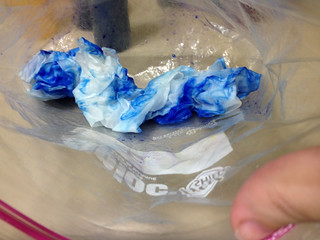
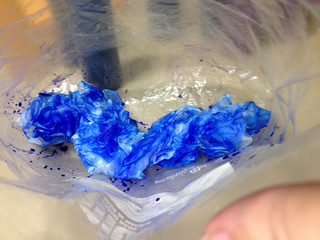
15 minute scarf: A Bread Bag Dye Tutorial

Welcome, Crafty Quickies guests and my loyal readers. As my contribution to the Crafty Quickies (crafts in 15 minutes or less) series, I present a tutorial on how to use the “bread bag” dye method with Colorhue instant set dyes (yes, really, a dye that does not require heat setting or lengthy waiting!) to dye a silk scarf. You may want to see my tutorial on how to mix the dye solution and my examples of several scarves and other things I have dyed with this method. Colorhue works best on protein fibers and rayon, other fibers will have a much less saturated effect.

[Note: this was my first day of trying to photograph a tutorial with my left hand, a few of the pictures are blurry. I apologize. I know I will need a tripod in the future but as we’re still unpacking from our move last week I just can’t find it yet.]

“Bread bag” dyeing (a form of low-immersion dyeing) is where you take some fabric and scrunch it up into a plastic bag, then apply a small amount of dye to the exposed parts of the fabric. Squish the fabric to ensure that the dye discharges (gets absorbed by the fabric), open the fabric up, scrunch it again with different bits showing and add dye again. That’s really all there is to it, but I’ll walk you through every step. Oh, and I don’t use a real bread bag as I like something a little more sturdy; I use a freezer bag because I know I can really squash it up without worrying about it springing any leaks. I’ve used the same bag over and over for about 20 projects so far and it’s still going strong.

Warning: These dyes really do set instantly. You may want to wear protective gear in case of any spillage: while the dye is best for protein fibers it will stain other fabrics and even light hair. (My cat loves the smell of these dyes for some reason, I’m sure one day she is going to wind up with a purple belly. On the other hand, I am going to use these dyes the next time I dye my hair blue — it would sure beat sitting under the dryer for two hours or leaving the dye on overnight!)

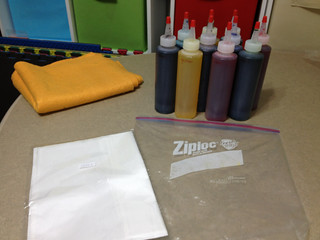
So let’s get started. You’ll need to gather your supplies: Pre-diluted Colorhue dyes in 3-4 colors (ideally in a squirt bottle or something where you can easily control where it pours), a silk scarf or other protein fiber fabric to dye and a strong plastic bag. Optional supplies if you’re impatent: synthetic chamois (you’ll want a few), an iron, an ironing board. (I get my scarves from DharmaTrading.com and my chamois are a Sham Wow knockoff from the dollar store.)

Supplies for breadbag dyeing
All you need to get started

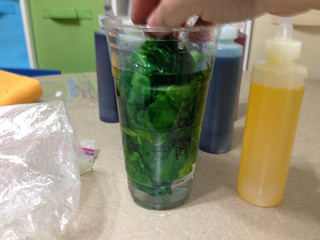
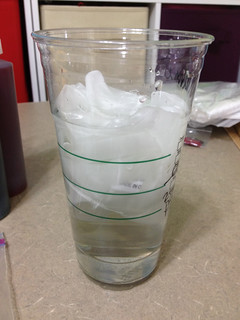
First, you’ll need to get your scarf thoroughly wet. You can do this in the sink but I had some water on hand already.

My silk scarf is submerged in a glass of water, totally wet.
It doesn't get wetter than this

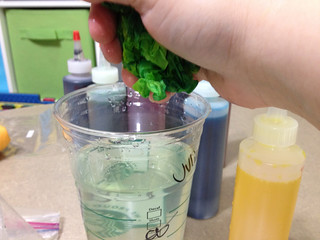
Now wring the fabric out thoroughly. Squeeze out as much water as you can. Mostly so you don’t drip on the way to the bag, especially if you are carrying this from the sink. (Ask me how I know 🙂 ) Also I find you get a more interesting texture if the fabric is wrung out. If it’s very wet the dye gives more of a “wash” effect, which can be lovely too. (At least this is my theory as to why I get different effects, I have not conclusively proven it. I could be wrong. In any case it won’t hurt to wring it out.)

Squeezing as much water out of the wet scarf as I can
Release some tension, give it a good squeeze!

Now open it all back up.

The wet scarf opened out again
You want to undo any scrunching you've just done, because you're about to scrunch a bit more artfully

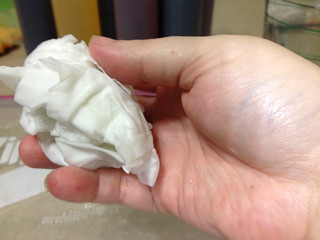
Now be a little more deliberate. Scrunch up the fabric along the length, I usually grab about a handful and scrunch, then another. You want it to be fairly even all the way along but you really don’t need to fret over it. Bread bag dyeing is all about serendipity so don’t overanalyze any part of it. 🙂 Think of this as a very haphazard accordion fold: you’re just trying to get some parts to stick up on the top, some parts to poke out on the bottom and the rest to be in the middle. This helps each color be more or less evenly distributed throughout. If you choose to not scrunch you’ll get larger puddles or pools of one color rather than lots of little ones.

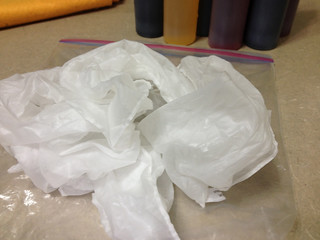
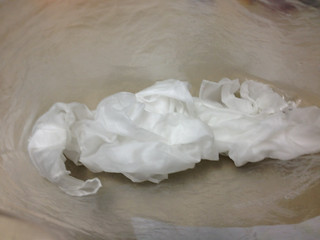
Once it is scrunched, place it gently into the bottom of your bag.

The wet silk is now scrunched up and sitting in the bottom of the freezer bag
There is no right or wrong way to scrunch

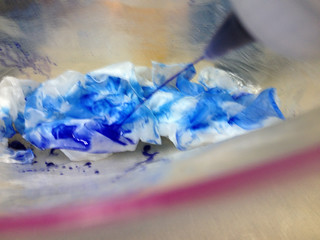
Now the fun begins! Squirt or pour a little dye onto the top of the fabric. Not too much, you don’t want the fabric to be swimming in dye just yet. You just want enough dye to cover the exposed area.

Squirting blue dye onto the white silk
Action shot!

I think this is enough dye for the first bit (like I said, some photos are blurry, sorry):

Blue dye more or less covers the white fabric
Oh no, has the whole thing gone blue?

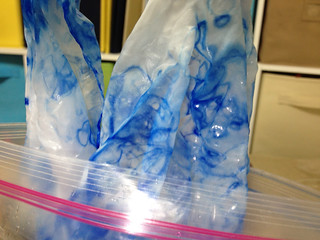
Look through the side of the bag, you can see there’s a lot that does not have any dye on it yet. You’ve only gotten started.

From the side you can see that there is only dye on the very top layer
Only the very top bits have taken any dye, this is what you are going for

Squish it from the outside just a little to pick up those stray drops of dye. Scrunch, dye, squish — that’s really all there is to it.

Turning the fabric over gently
Action shot! Sorry for the blur

Because there’s no excess water to allow the dye to move around inside the bag, this first time it’s a good idea to reach in and gently turn the fabric over. Don’t undo your scrunching as you turn it. Now you can see the fabric’s white belly. Just like my cat’s. It’s crying out for some dye, don’t you think? (The fabric that is, not the cat. Although maybe….;) )

The underside of the scrunched fabric is mostly white
White fabric just waiting to take your dye

Add more dye until this side, too, looks fully colored. Don’t worry if there are some white bits showing, they’ll get taken care of later.

Fabric that appears to be almost all blue
Don't be a perfectionist, a wee bit of white here is OK

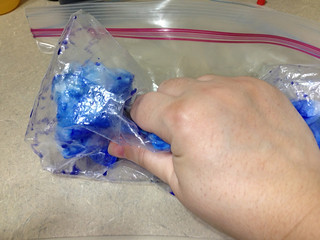
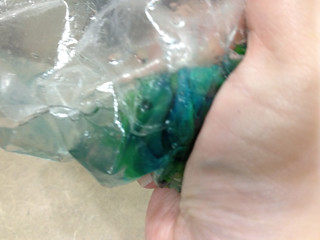
Grab the fabric from the outside of the bag and give it a squeeze.  You’re trying to get any loose dye to go on to and get absorbed by the fabric. Just give it a few squishes and also move it around so that it picks up any droplets of dye clinging to the side of the bag.

Squeezing the fabric through the bag
A few squishes and squeezes

Take the fabric out of the bag. You’ll want to open up the bits that were previously scrunched. What looked like it was mostly colored before now shows vast expanses of white. You could stop here if you wanted to, but with all those white areas I just want to have at ’em with more dye 🙂

The scarf is coming out of the bag: small areas of blue stand out against a lot of white
This is your first peek at the sort of results you get with your scrunching

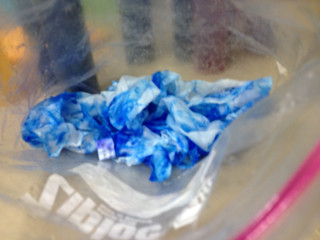
Scrunch the fabric again.  You’re aiming to have more white bits sticking up on top than already colored areas. Like this:

The scarf scrunched again and in bag, more undyed areas are showing than dyed ones
More white fabric, just waiting for color!

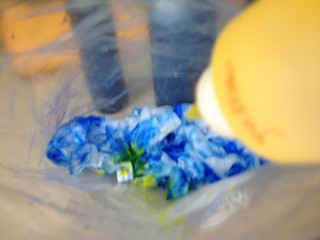
Go on and add your second color. I’m using yellow.

Yellow dye squirting out onto the fabric (inside the bag)
Watch it change before your very eyes!

Once again, cover the whole top with the new color.

The scarf now has yellow dye as well as blue
You can see the yellow and blue have made green where they overlap

This time you don’t need to turn the fabric over.  You’ve got enough liquid in there and also unless you were really overachieving, you didn’t try to get a lot of white showing on the bottom, just the top. So it’s time to squeeze. From here on, when you squeeze you want to keep massaging the fabric until the water is mostly clear. It doesn’t usually go all the way to clear but you want it to be very pale. You may have to squeeze the whole scarf down into one corner just to be able to see the excess water at this stage.

You can see the excess water on the left side of the bag. That’s what I mean by “mostly clear”.

The excess water is a very pale yellow
Just a little tint in the excess water

If the water is mostly clear that means that the dye has been absorbed. If it’s not turning clear you have a few options: wait about a minute to see if it absorbs naturally, keep squeezing to try to get dye deeper into the bunch, and/or open up the fabric a bit to allow contact with fabric that does not have as much dye. I try to avoid the latter if I can as it messes up all that artful scrunching.  Also beware that somewhere out there is a point at which the fabric cannot absorb any more dye, at least not without drying it out and rewetting it. If the excess water just won’t clear up for you, you may just have too much dye for that fabric. Pour out the excess (I usually pour it into an empty water bottle — hey that dye is still good and can go onto another project) then rinse the piece, dry it (see steps below) and if you want you can wet it down and start adding color again.  So far in about 20 pieces I’ve never had the fabric not accept more dye on the second time around, so you should be fine. (Maybe if you don’t dilute the dye this could happen. I haven’t tried it.)

Now it’s time to pull the scarf out of the bag again. You may be thinking that it’s all dyed by now but probably not: the scrunching always keeps parts of the fabric protected so they don’t get that round of dye. Mine still has plenty of white bits showing:

The scarf has two colors of dye but still a lot of white space
After two colors there is still some white showing

Again, you could stop here. There’s absolutely nothing wrong with white being part of the design. But I’m a glutton for punishment, I generally do 3-5 rounds of dye. So it’s time to scrunch it up, once again targeting the white areas to be hit by the next lot of dye.

In the bag, scrunched fabric waiting for more dye
There are fewer white areas but I still tried to get them to the top

It’s time for the third color. I used turquoise, which doesn’t show up that well since I already have a darker shade of blue. But you can see that it does get more color:

In the bag with a third round of color, a lot more saturated now
It's getting darker overall, more saturation

And squeeze. The water seems even clearer than the last round. The dye can get absorbed at any point when it meets fabric that can hold more.

The excess water is now just slightly tinged with a blue-green
Just a bit of bluey-green tinge, not bad!

It’s important to remember at this point that the dye always looks a lot darker when it is wet. I had planned to add a bit of dark green at that stage but I really liked the limey shades and didn’t want to risk making them darker. (In retrospect it would have been fine, but I’m still learning how to gauge how the scarf will look when dry from the wet version.) Instead I decided to add another round of yellow. I scrunched it up as usual, but then when squeezing it I reached into the bag to open the fabric up as much as I could so that the yellow would hopefully get into any white spaces that may have been left. You might think that adding anything would make the whole piece darker but I find that adding a light color near the end just strengthens the light areas and covers any remaining white without making the piece darker over all.  See for yourself:

Before adding the yellow:

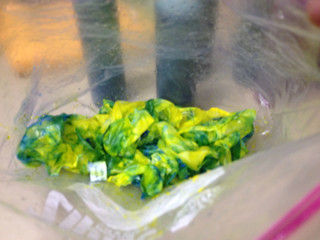
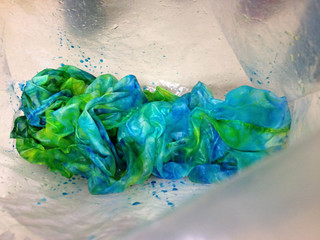
The scarf is in the bag, many shades of blue and green
Looking very green

And after:

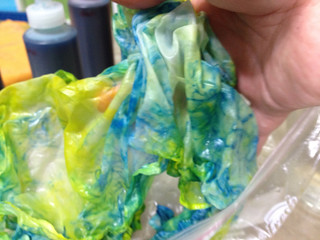
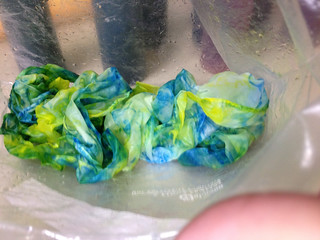
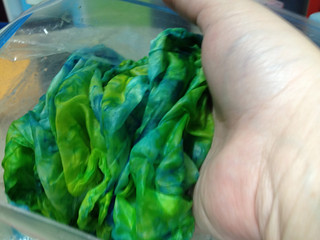
Scarf opened up in the bag, dyes are brighter than before
The yellow tones are more pronounced

Some of the brightness of the second photo might be because I fixed my clip-on light to shine into the bag better. But I do think that the second picture has a lot more yellow in the tones overall. Maybe I’m just high on dye fumes… on no wait, there is hardly any odor to the dyes at all, only my cat seems to be able to smell them (she usually come to watch, I have no idea why she is so fascinated with these dyes). Anyway, I liked the effect, and I knew that the white was now all covered with color. I decided to add a touch of that darker green after all. But I won’t bore you with the pictures. As I’ve said, you can stop at any point, or you can keep going. I’ve done as many as 7 rounds of dye in one go, without drying it out in between. So as long as your water is mostly clear at the end of the squeezing part you can always try to add more.  I don’t use more than 4 colors though as I fear they would blend too much and get very muddy. You can always try it and see! I just think that other dye methods would be better if you want to have more than 4 shades clearly distinguishable.

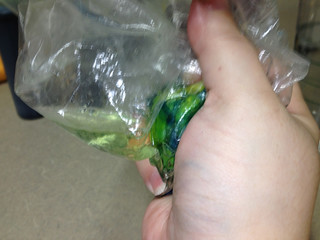
After you’ve finished squeezing, it’s time to take it out of the bag for the last time.

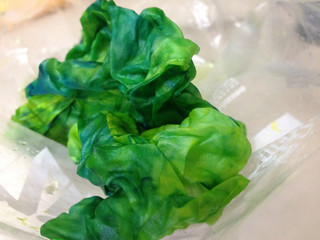
A fully dyed silk scarf emerges from the plastic bag
The final product emerges

At this point you could call it all done. With the bread bag method there is not a lot of undischarged (unabsorbed) dye left, so you’re not going to have much run-off when you wash it the first time.  I don’t usually rinse, but this time I had water handy anyway, so let’s go for it.

dunking the scarf into plain water
Dunking in plain water and swishing a little will rinse off the unabsorbed dye, you could run it under the faucet in the sink if you prefer

When I wring it out I can see that there is a little tint to the rinse water, meaning that I did have a little bit of dye come out. But actually some of that tint was already there when I had used the water to rinse out my eyedropper when I was mixing the dye solution. In any case, there’s not a whole lot of excess dye to worry about, as you can see. That’s why I don’t generally do this step.

Wringing out the scarf, the water left behind is slightly green tinted
Just a bit of green tint to the water, as far as I have tested that's all that is likely to come out, the rest of the dye is well and truly set now

And voila, this is what the scarf looks like rinsed but still wet:

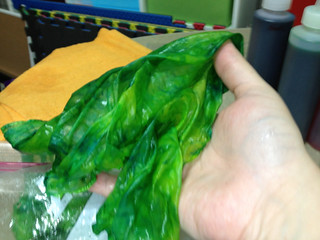
A wet but fully dyed silk scarf
It looks very green, doesn't it? I wouldn't expect there to be any true yellow left from the way it looks now

At this point I’m at the end of my 15 minutes for the Crafty Quickly challenge. You can just stop here and hang the scarf up to dry, or throw it in the dryer if the fabric allows. I’m far too impatient for that, I know that it will look different when it’s dry so I hurry the process along.  But, as I said, this is totally optional. (This part takes 4-5 minutes, tops.)

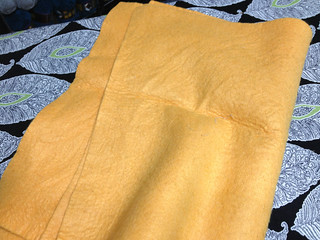
For the speedy gonzales drying method, I grab the synthetic chamois.

Cheap synthetic chamois
Dollar store ones work perfectly, I do wash them occasionally but they never get stained by the dye, they can get very wet though if you do a lot of pieces in one session

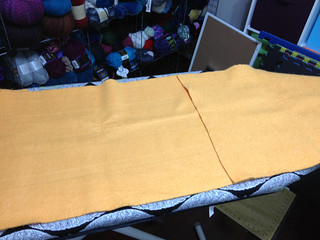
Lay out the chamois on your ironing board, overlapping just slightly so there are no gaps.

Chamois laid out on ironing board
It's chamois on an ironing board, I have run out of witty or insightful comments

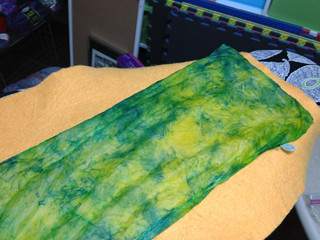
Now stretch out the scarf onto the chamois:

Scarf on chamois on ironing board
It's a wet scarf on a chamois on an ironing board. Woo?

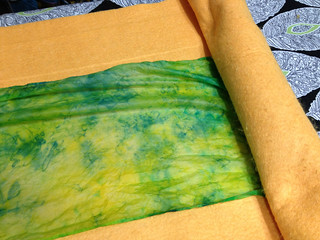
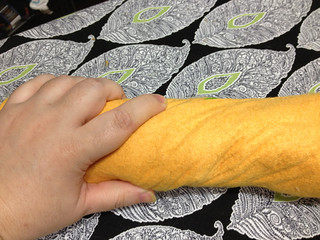
Now roll them up together like a jelly roll. (Now I’m making myself hungry. Or quilty. Hard to say.)

Rolling up the chamois and scarf together
Roll, roll, roll your scarf

(It’s late at night, I shouldn’t be allowed to blog at this hour. I’ll set it so that you can have this lovely jelly roll imagery around breakfast instead, is that better?)

Once it is rolled up, give the whole roll a good twist. Wring it out. The goal is to get the excess water out of the scarf and into the chamois. You don’t have to be very gentle, unless you have some incredibly delicate fabric, because the chamois will absorb most of the force.

The roll is now twisted up

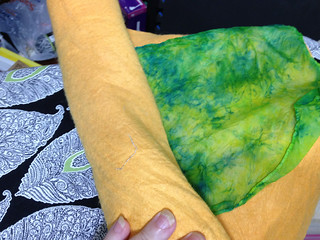
Now unroll it, so that the scarf is on top and the chamois is against the ironing board. This is probably the hardest part and it’s somewhat optional. I just like to make sure my ironing board cover doesn’t get wet, especially if I am doing a lot of scarves in one session. But at this point most of the water is in the chamois so it doesn’t matter too much.

Unrolling the bundle
Just like rolling it up, in reverse. Are we there yet? I wanna see the finished piece already! Told you I was impatient 😛

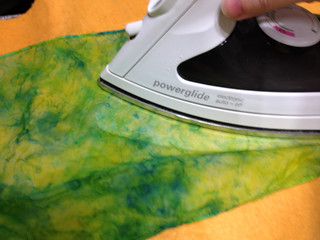
If I was smart I would have told you to turn on your iron at the point where you get out the chamois. I usually forget to do that though, so insert a few seconds here for it to warm up. Use the hottest setting your fabric will allow. The ironing will dry the fabric and remove the wrinkles at the same time. Handy, eh?

Ironing the wet scarf
The eagle eyed among you may be able to spot the area that is already dry. See how much lighter the colors are just by the iron?

The colors really get lighter as the scarf dries. It can be hard to see against the dark background of the chamois though and even harder if I was doing it directly on my black ironing board.

Maybe this will help:

Left hand side of scarf is wet and darker, the right hand side is dry
The left hand side is wet and thus darker. The right hand side is lighter and the silk has regained its natural luster, reflecting even more light.

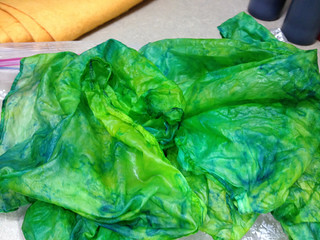
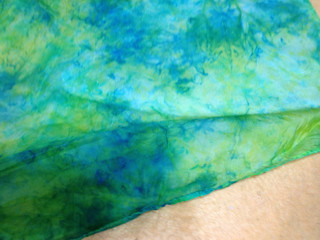
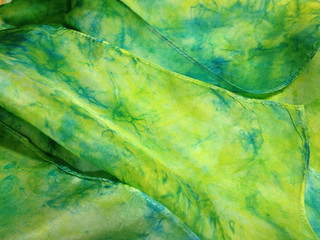
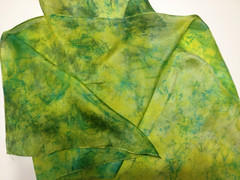
And now we are done!  Here’s a pic of the scarf on a white background.  Unfortunately I don’t have a light tent so you can’t see the full effect but hopefully you can tell that there is actually yellow showing, or only a slightly greenish yellow, along with blues and greens. Success!

The finished product: a Yellow, Green and Blue hand dyed silk scarf
Ta-da!

The project took 15 minutes for the dyeing, about 5 minutes for the optional drying method for impatient people and cost under $5. That’s my kind of crafting 🙂

I hope you enjoyed this tutorial. Do come again sometime. 🙂 Meanwhile, if you haven’t been there already, you may want to head over to the Crafty Quickies Roundups for more 15 minute craft ideas over at Moore Craft Time.

Thanks for stopping by! Feel free to give me a shout if you have any questions. I’ve only been playing with this dye for two months or so now but I think I have the bread bag method mostly figured out, so I’ll do my best to answer.

Tutorial: Mixing Colorhue Dyes

Colorhue dye by Ginny Eckley is safe, non-toxic and sets instantly on protein fibers: there is no need to heat or leave it to sit for days and you don’t need a mask or special equipment when mixing up a batch of dye. This makes it a fantastic dye for impatient people like myself! But you do need to prepare the dye in advance by diluting it with filtered or distilled water. Once you get a set of diluted dyes mixed up you can do several projects (about 15 scarves for my set of bottles) before you have to stop and mix more, so again, great for the person who likes jumping in quickly and seeing the results fast.

You’ve hopefully seen my post about the fun I have been having with Colorhue instant set dyes for protein fibers. I’ve discovered a few things (finding out the hard way) that make the prep stage easier so I thought I’d do a little tutorial about how I mix them to get them ready for use.  Tomorrow I will be posting a tutorial on how to make a scarf with the “bread bag” method (which is what I used for most of the things I have posted).

First off, you’ll need to acquire some Colorhue. You can buy them many places, I got mine from a vendor at SAFF and paid the full suggested retail price of $40 for a ten-pack sampler. That same Colorhue Sample Pack is available at DharmaTrading.com  for $35.99 plus shipping (which is also where I buy my pre-hemmed silk scarves — really if you are a dyer or want to try it Dharma Trading is the place to start, they are cheaper than anyone else I know of and have the best selection of dyes and dyeable fabrics). The sampler pack has half an ounce each of the ten colors that come prepared, you can also mix to get your own shades. Please note that there is not a red by default, but these dyes work on the CMYK color system not RGB so although you may have learned that red is a primary color, that’s not the case here.  You can make a variety of shades of red by mixing yellow with rose (really a Magenta for the purposes of CMYK). I do wish they’d go ahead and come out with a red, though. It’s just annoying to have to mix it up all the time as it is a color I use often in my work (I haven’t shown you those scarves yet, I will soon).

In my experience the sampler pack will dye at least 40 scarves plus assorted other items. It’s a good value if you want to have every color, but it is more economical to buy larger bottles (available in 2 and 8 ounces) if you find you use certain colors more than others. I plan to do that when I start running out of my favorites.

*Apologies: this is my first time photographing a tutorial with my left hand. It’s a little harder than I had thought so some of the photos are a bit blurry. I’m sorry! I think I will use a tripod in the future but we’re still unpacking from our move to Austin and I couldn’t find it. 🙁

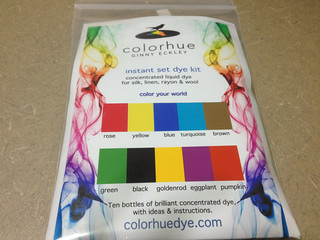
Here’s what the sampler pack looks like:

Colorhue Instant Set Dyes, 10 Bottle Sampler Pack (Front view)
Front of the Sampler Set
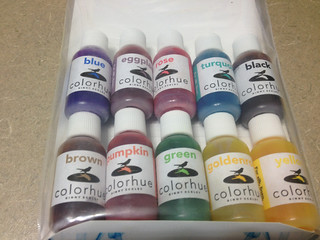
Colorhue Instant Set Dyes, Ten Bottle Sampler Set, View of Bottles
This is what the bottles look like

Now the directions (on the website, it doesn’t come in the package) say to use 15-20 drops of dye per 1/2 cup of water (4 ounces). I’m far too lazy (and shaky) to count out drops individually. I use glass eye droppers (also from Dharma Trading) and use one full eyedropper per ounce of water. I think this is a little bit more than their 15-20 drops but not by much.  This comes out at a medium level of saturation and one that I am happy with. For pastels, use one eyedropper of dye for every two ounces of water.

Colorhue 0.5 oz bottles out of the package
The little bottles out of the packet. They may look small but they are powerful!

You’ll need something to mix and store them in. You could just use cups or anything with a lid really, but I find it is much easier to use little squirt bottles. The demo I saw when I bought them used sports-capped water bottles and dumped the whole bottle of dye into a 20 ounce bottle of water. I couldn’t find any water bottles the size I wanted so I found these little ones with spouts. (Again, from Dharma Trading. I got 6 ounce bottles because apparently 6 oz is not a popular size with dyers so they had them on clearance. Then I also got some more 6 oz bottles from Wilton on clearance at a big box craft store so I have spare bottles for mixing colors in.)

You don’t need a fine squirt tip for most dye techniques, but when doing a graffiti-style direct application it helps, so I can use these bottles for every method I’ve tried so far without needing to change to a different applicator. If you are doing immersion dyeing obviously you will want to have your dyes in a bigger space to immerse the fabric but I find this very easy for the mixing stage and plan to then dump the mixed solution into the other receptacle for the bath. That way I can mix up more dye than I need for a specific dyebath and still have them handy for other uses in the future. If you are doing large dye baths (for instance if you use the whole bottle in one bath) you may not want to pre-mix, you’d add the dye straight to the bath instead. I haven’t done this yet so have no idea what the water to dye ratios will work best in that situation. I’ll let you know when I find out.

I strongly recommend that you label each bottle with a permanent pen or marker — not only does the sample pack have two shades of blue and two shades of yellow that would be very hard to tell apart with the naked eye but also the purple and black look very similar when in the squirt bottles.

Oh yeah, before you start mixing you might want to put on gloves, an apron, or black clothing. Although Colorhue only dyes protein fibers and rayon in saturated shades it *will* dye cotton and other fibers a bit too, so it can stain your clothes and will stay on your hands and fingernails for a few hours at least. I don’t make a huge mess but I also usually wear black when dyeing so it’s only my hands I have to worry about and I really don’t care if they get dyed. [I really am planning to use Colorhue the next time I dye my hair, so blondes might need to watch out for that too!]

I filled the bottles almost to the top with filtered water. In my previous batches I used bottled water, but it doesn’t matter a whole lot except that you will want your water to be consistent, the minerals in water can alter the shade of dye subtly, so once you pick something it’s best to stick with it at least for the whole batch. I left a little room at the top of each bottle because I was going to add 6 eyedroppers’ worth of dye to each bottle. (My other bottles have ounce markings so it’s easy if you only want to do 2 or 4 ounces instead of 6 at once, or you can just eyeball it.)

Mixing Colorhue dyes for bread bag dying
These are the bottles I prefer

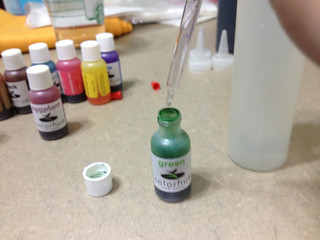
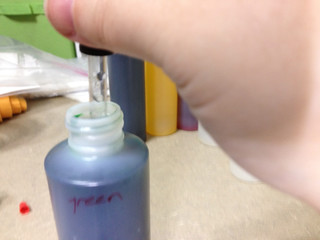
It’s fairly easy from this point. Just load up your eyedropper:

Getting ready to mix Colorhue instant set dyes, the eyedropper meets the bottle

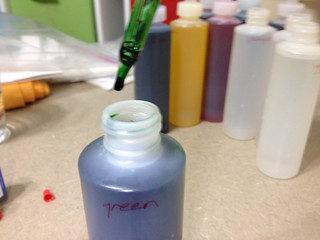
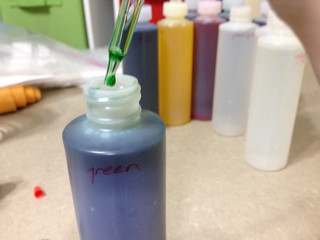
Then add the dye into the water:

Adding an eyedropper of dye into a bottle of water
It's fun to watch the dye swirl around at the beginning

You’ll notice that there is some excess dye clinging to the eyedropper. Don’t worry, it’s not stained or ruined.

The eyedropper still has some dye clinging to the glass
The dye clings to the glass both inside and outside of the dropper

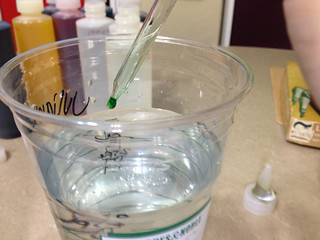
Because a bit of the concentrated dye clings to the glass, you’ll want to add that to the bottle as well so you don’t waste it. When you have finished adding in the dye, dunk the eyedropper into the bottle. Swish it around a bit to remove the dye from the outside of the dropper, then fill and empty the eyedropper into the bottle a few times to get the dye from the inside.

Dunking the eyedropper into the dye to remove most of the excess
Waste not, want not. Every little bit of dye helps your colors be more saturated.

Because you are rinsing the inside with diluted dye, it won’t rinse clean. But at least you’ll have used up the very concentrated dye.

A little bit of dye still shows up in the eyedropper
See, there's still a little color, but it's less.

Now you need to clean out the eyedropper before moving on to the next color. So repeat the procedure with plain water.

Rinsing the eyedropper with plain water
Let's get the last little bits of dye out

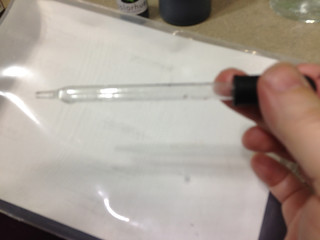
Hold the eyedropper against a white background to be sure you’ve gotten all of the color out and it is clean for the next shade of dye. (Sorry this is really blurry.)

Holding the eyedropper against a white background
If there is any dye left you'll see a tint here; this one is clean.

In the home stretch! Now we need to put on the cap and give it a little shake. If you are using a larger container you could just stir it a bit with the eyedropper before you clean it or use a straw or spoon to stir. (Remember, once something has been used for dye it should never be used for food; even though this is non-toxic, it’s a good habit to be in.)

Hold the cap firmly before shaking
Hold the cap on tightly, then give a little swish or shake

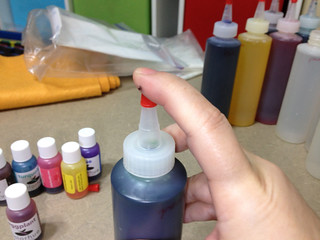
You can easily see if you forgot to shake: even one little swish will usually leave some stuck in the spout. This also makes it a little bit easier to tell the colors apart without having to read the label (unless it’s those pesky blues and yellows that look almost exactly the same in the bottle but look quite different on fabric).

A little bit of dye clings to the spout
This may not happen with other bottles but I find it useful

And now you are ready to dye!

Come back tomorrow for my tutorial on “bread bag” dyeing.

Any questions?

Experiments with Colorhue Dyes

I am absolutely in love with the Colorhue brand of dyes for protein fibers.  What’s not to love about instant set dyes (no heat or time required) at affordable prices?  Since I am going to be doing a tutorial later this month on how to dye scarves with this method and a full product review for another site, I’ll just show you some of the results I’ve gotten with this product. I’m utterly addicted!

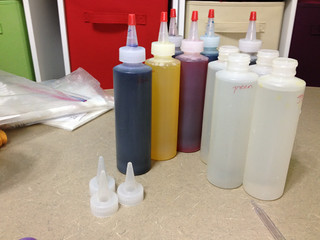
Colorhue Dyes diluted and ready to use
Ready to use

The dyes come in a very concentrated form, sorry I haven’t taken a picture of them in their packaging.  While the instructions say to use just a few drops per half cup of water, I found that to be very pale. I use one eyedropper of concentrate per ounce of distilled water. The first few I did used less than that, so you’ll see that some are more pastel. (Squirt bottles are not required, it depends on what sort of dye techniques you will be using, so far I have been doing what is known as “bread bag” dyeing, a low-water technique.)

Plain white silk scarves ready to dye
Dharma Trading sells wonderful white silk scarves ready to dye

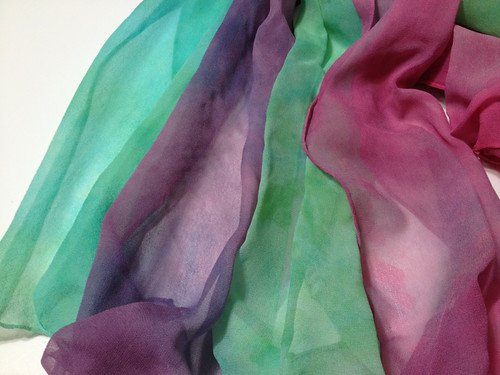
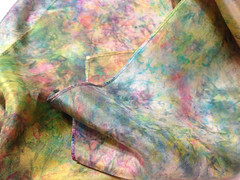
Once you’ve mixed the solution (and there are no toxicity issues here!)  you need something to dye.  I had ordered a large batch of scarves from DharmaTrading.com — they have fantastic prices and a wide assortment of sizes.  You can also buy the Colorhue Dye from them directly, although I had bought mine from a vendor at SAFF. I also bought a pillowcase because I often have flareups of dermatitis on my face and having a silk pillowcase is very soothing. Plus I did one experiment with some wool. I’ve since bought a lot more wool to dye but that will have to wait until after my move, alas. So first I started with some silk chiffon scarves that I bought at SAFF when I bought the dyes. These are very sheer so it is hard to see the true colors in the photos.  Also this was when I was using one dropper of dye to two ounces of water, so the colors are less intense. Handdyed scarf Handdyed Chiffon Scarf Handdyed Chiffon Scarf Two handdyed chiffon scarvesBecause these scarves were chiffon it was very hard to photograph them properly and it is hard to see the color distinctions. I have learned a bit more on how to make the variations in color and tone more obvious with more concentrated dyes and different base fabrics, but you’ll just have to trust me when I say these are a lot prettier in real life. Here’s the first batch all together:

Batch of handdyed chiffon scarves
I was going for a floral-inspired palette with these scarves

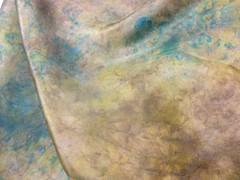
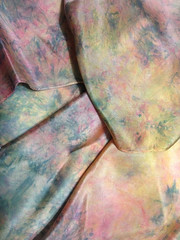
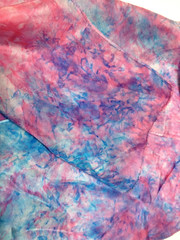
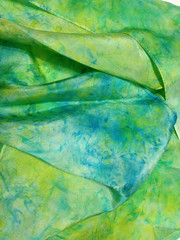
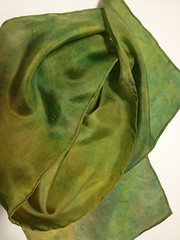
This image shows a bit more of the intensity, plus it’s a little easier to see the mottled shading. I dyed all of these twice as the colors were just too pale the first time so I kept layering more dye on them. This is why I doubled the concentration of my dyes the next time I mixed a batch. After these scarves I moved on to the pillow case: Handdyed silk pillowcase Again I had to keep going back and adding more dye, I still think the colors are far more pastel than I’d like (it really doesn’t match any of my bedding). In a final act of frustration I wrung out most of the water and them drizzled the black over the top. I love the effect the black had but I’m still debating redyeing the colored bits to be more intense. Or maybe just doing another pillowcase 🙂 At the same time I tried a bit of wool, like the kind used for applique and rug hooking.  Again the colors were very pastel, due to the diluted dye mixture. I do sometimes need pastel so I will probably not redye this one, but will definitely use more concentrated solution in the future. Handdyed wool I did a few scarves in the habotai silk, but wound up redyeing most of them (as I will show you later). By this point I was fed up with the pastel shades and doubled the amount of dye in my mixtures.  From this point I become a MUCH happier camper.  Here are a slew of examples:

Handdyed silk habotai scarf Handdyed silk habotai scarf Handdyed silk habotai scarf Handdyed silk habotai scarfHanddyed silk habotai scarf Handdyed silk habotai scarf Handdyed silk habotai scarf Handdyed Habotai silk scarf

Unfortunately I still don’t have a light tent so not all of these photos are true to color. However I think they give you a decent idea of the range of palettes you can achieve with the basic Colorhue starter set. Remember how I said I’d re-dyed a few of the too-pale ones?  Here they are, for comparison:

Handdyed silk habotai scarf (I didn't like) became: Handdyed silk habotai scarf

Handdyed Habotai Silk Scarf -- too light Re-dyed habotai silk scarf for my mother

This one (first, pink) was OK, but didn’t go with my mother’s wardrobe, so I went to a more plum shade (second photo). The image doesn’t really do that one justice, the shinyess of the silk makes it look lighter than it really is.

So — these are my experiments so far. I can honestly say I am hooked.  I’ve already got more wool and will be ordering more scarves as soon as payday comes around. Although I have no intention of selling crafts for personal profits (most of these have been given away already or are waiting to be given away), I am wondering if this might not be a good way to raise funds for my charity.  If I *did* sell these scarves, what do you think would be a fair price for them?  I know that handdyed silk usually fetches a decent amount, fair above what the supplies cost, but I’d like to make them affordable yet profitable enough to help the charity.  Suggestions?

Moving for Crafters, Part 1

The most essential things to keep in mind when moving home are to find a city or region with a lot of craft mojo and to find a house that is perfectly suited to your crafting needs.  We picked Austin, Texas (having lived there before) which is filled to overflowing with great indie-craft people. Next we found a house. We had the luxury of being able to afford an extra bedroom to be my studio, although in our case with my husband working from home part of the time and me mostly housebound it was less of a luxury than a sanity saver.

So I have a bedroom just for crafting and until we buy dining furniture (if ever?) there’s also a lovely formal dining room I can use for say, blocking out large projects or pin basting quilts.  Then there is what I consider the best bit: the screened in porch.

The large screened-in porch, with fans
With apologies to the photographer as I do not know who took this photo

How many times have you wanted to do something with stinky products and read the directions “Use only in a well-ventilated area” then been frustrated because just opening the window isn’t enough to deal with the fumes? Well I don’t think I will have that problem again. Between the screens allowing full air flow and the fans overhead, I think it would be hard to get any more ventilated in a residential setting! Plus it is a great place for wet felting which can get a little messy as the soapy water sloshes about.  This is a rental house so of course I will be careful and use drop cloths, etc., but my mind is already abuzz with the possibilities!

Another advantage of this house is that it is only a few blocks from the main library, so anytime I need a little eye candy but don’t want to be tempted to buy anything I can go there and peruse the stacks and I am still allowed to bring things home with me, if only for a little while.

So there you have it, Step One is find an ideal residence to facilitate your craftiness. Check!

We don’t actually move in until the 19th but before then I will be starting on Step Two: scout out (by internet and especially Ravelry) the craft stores and groups nearby so I can be ready to leap in with both feet as soon as we get to town. Come back next time for tips on how to do that.

What do you wish you had in a home that would make your crafting life easier? Do you have any tips for me as I go about setting up here? Advice always wanted!

PS — If you are moving to Austin and want to rent a property, I HIGHLY recommend @ShelleyRowton of RE/MAX River City!! (I guess she does sales too but we aren’t looking to buy yet.)

Putting on an old hat: On the Perils of Pinterest

I was featured on CraftTestDummies.com

Today my guest post for Craft Test Dummies went live, so I guess I am allowed to share it 🙂 The subject is Pinterest, particularly the various controversies surrounding its terms of use, copyrights and related issues. You may not know that I was a copyright lawyer before I got too sick to work, and it’s that hat that I wear in this article.

You can find the article by clicking on the image above.

Welcome to the hovel

Things in moving-land are going a bit crazy. We’re having all of our stuff shipped via a container system so it’s all got to 2 weeks before we do. (It is actually much easier for us health-wise since we only have one able-bodied-ish person to do the actual lifting and carrying and this way we’re not rushing to load or unload a truck in a single day.) My half of the studio I have shared with my mom off and on since 2009 is slowly getting packed away. In some ways it’s embarrassing, as I am faced with just how much stuff I have managed to accumulate. In other ways it’s exciting as I am remembering cool things I own but haven’t seen in a while.

(This move is also a bit nerve-wracking as we don’t have a house yet. We have several we’re trying to choose between but it will probably be sight-unseen just due to the tight schedule and the fact that my husband starts his new job on Monday so we only have enough time to get things packed and not time to go halfway across the country to house hunt. Luckily we have a fantastic realtor working with us who knows the rental market very well, and we trust her judgment!)

Meanwhile this blog is still neglected. A big shoutout to anyone who has wandered here because of my post on Craft Test Dummies! I hope you will pardon my dust, I promise to be back starting next week. (Without my studio and stash I forsee a lot of boredom coming on!)

If you don’t know much about me, you can wander around this site a bit but probably a much easier way to find out is to listen to episode #92 of the Craftypod, featuring yours truly. I talk about how crafting keeps me going and also why I spend so much more time on Twitter than I do blogging. (In case you didn’t know, you don’t need an ipod to listen to a podcast. You can listen right there on that website by clicking the little grey button with a triangle that looks just like the “Play” button on your CD or DVD player).

Whether you are an old friend or new, I hope to hear from you!

Obligatory cute photo (and explanation for why some days I just can’t manage to get any crocheting or knitting done):

IMG_0173

Movin’ right along

The tumbleweeds are blowing through this blog like the West Texas desert. All is not lost, this time I do sort of have a good excuse and for once it’s not my health.

You may know that for the past two and a half years I have been going back and forth between the USA and Australia as we’ve been waiting for my husband to get his green card and be able to live and work in the US. That time finally came and he moved to the US in January. This past month we’ve been working on packing up all of our belongings and he has found a job already so we’re preparing to move to Austin, TX in the next two weeks or so.

I have been crafting like crazy but I have not really had time to blog. However all of the craft supplies have to be packed up and loaded by Saturday (save some emergency crafting gear!) so I’ll have a bit of time to catch up on blogging and introduce you to the many things I’ve been up to.

I’ve also recently written a guest blog post for a much larger website on a subject very important to me — so important that I thought it needed a bigger platform than my handful of loyal readers.

So now that all of that is done and dusted, regular service on this blog will resume again soon. I have so much to show and tell you all that I almost can’t wait…but unfortunately I must because the movers wait for no woman. I’ll also be starting a small series of blog posts about crafty travel and moving tips on how to find your way around in a new place. I’ll take you with me as I do this yet again for the second time in two years, and I know Austin is bursting with crafty goodness so it should be quite a treat!

Until next time…