Getting ready for the Hollydaze!

Well it is that time of year again where I attempt to make presents for my family for Christmas.  This year I thought well ahead and took yarn from Peaches n Creme (made in Pisgah, North Carolina!) with me on my trip to Sydney, Australia.  So I have had a little while to get cracking on these things.

I had 9 couples on my present list this year, so I decided on one dishcloth/washcloth/hotpad and one Christmas tree shaped ornament.  (Both are crocheted, my passion this year.) Here’s how things came out:

A stack of dishcloths I made for the holidays
This is what 9 dishcloths look like before washing
What dishcloths look like after laundering
After washing the stitches are tighter and the fabric is softer

I used a really basic pattern that I have seen many places and memorized it so long ago I don’t really remember where it came from, sorry.  As I said before the yarn was Peaches n Creme, a perennial dishcloth favourite in the US but one that is rare here in Australia.

And then there were the ornaments!  I made some of these for my mom last year and they were so easy to make that I thought I’d do it again:

12 crocheted tree ornaments
12 ornaments drying after being starched on the ironing board

The green yarn is local Australian: Sullivans Coton-A 5 ply, a cotton-acrylic mix that was very pleasant to work with. The pattern is Grandma Tree by Michelle Kludas/The Royal Sisters (Ravelry page, pattern page) which is designed for larger yarn as a scatter decoration but I’d found that it’s a good size for an ornament (about 3 inches tall) when worked in a fingering weight or close thereto (5 ply).

I can’t decide if I should add a loop of yarn at the top or not. If I don’t they can be used as other sorts of decor if the recipient prefers…so I am leaning toward not. But I’m afraid that without the loop they won’t know what to do with them at all!  Decisions, decisions…. (and not that I have much time as I leave Australia in two days!!)

I have three spare trees if anyone wants to do a trade! 🙂 I always need more ornaments 🙂

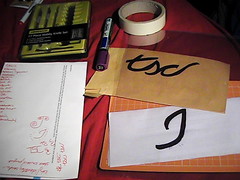
Finally, I made some Christmas cards for the inlaws here in Australia.  (I haven’t even started on the ones for people on my list in the US! That will have to wait til my return.)

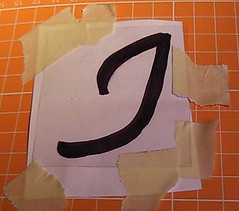
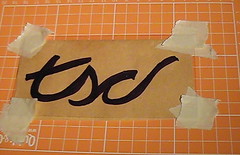
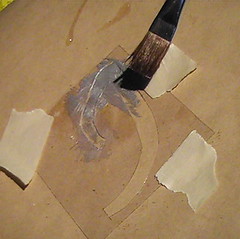
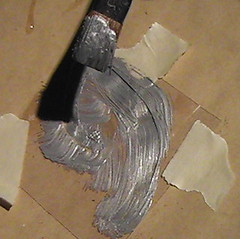
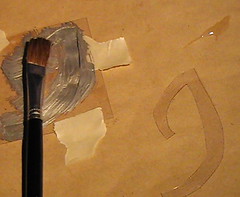
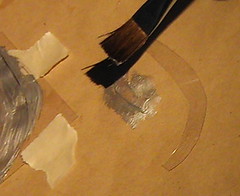
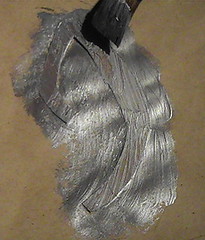
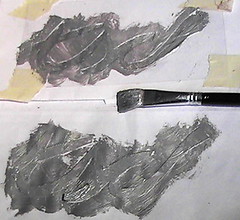
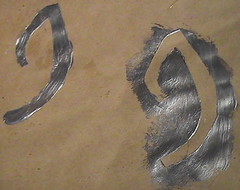
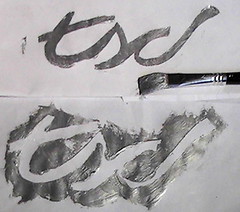
Inspired by @ChristineUrias on the Scraptime video podcast, I decided to use Pan Pastels and a stamp.  I then tried to tart things up a bit with some markers and then sprayed the whole thing with acrylic sealer.  Here’s the whole lot drying:

11 holiday cards waiting for the spray to dry

Products used:

  • Rosie’s studio pearlised cards & envelopes in cream (made in Australia)
  • Stamp: Happy Christmas by Fern Gully Stamps (made in Australia)
  • VersaMark Ink
  • Pan Pastels
  • Marvy Twinklette markers
  • Micador workable fixative (made in Australia)

The cards I made for Xmas 2010, Australian family

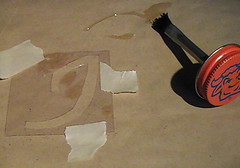
The basic principles were explained in a Scraptime episode, but the concept is simple: Stamp onto your paper using VersaMark or another watermark ink. Swipe Pan Pastel (here I used Permanent Green) across the image.  Where the Versamark was will show up darker.  NOTE: let the ink dry before swiping with pastels else you will get smears and blurs.  Ask me how I know this 😛 *rolls eyes*  Spray with workable fixative and let dry. Then I coloured in the stars with a red Twinklette marker and the baubles with the silver.  The silver marker turned out a lot darker than I had thought 🙁  I was going to add some stick on rhinestones too but I found out too late that the ones I had bought were not suitable as they had the wrong sort of adhesive.  Oh well!  I then sprayed it all again with fixative just to be safe.

I can’t say that I am thrilled with the way they turned out but I am short on time and hey, they will do the job.  Handmade cards are rare nowadays so I hope they are appreciated.

If you have any questions or comments, please drop me a comment.  I’ll be unavailable Sunday, Dec 5 as I will be flying back to the US via New Zealand, but I will hopefully feel up to being online again on Monday.

What are you making for the hollydaze this year?? 🙂

Items to Craft for Chronically Ill Friends & Relatives, Part One

National Invisible Awareness Week has ended but it’s still National Pain Awareness Month and right now I’m well aware of my pain so I thought I’d blog instead 😉  In honour of my Crafting for Causes charity program (which has NO donations yet *sniff sniff* — whatcha waiting on people??) I thought I would list just a small sampling of items that could brighten an ill person’s day and/or make their lives easier. Of course some of this depends on what kind of illness they have but you’d be using your judgement, of course!

Papercrafting

  • Handmade cards and postcards (can involve sewing/quilting/fabric/etc too!)
  • Signs of good wishes to hang up near their bed/lair
  • Mini-books filled with inspirational quotes
  • Personalized stationery to make it easy to write notes to friends — with postage included
  • Blank journals to record their health, feelings, dreams or wishes, etc.

Quilting

  • Lap quilts for wheelchair users (I like 30 inches square finished size)
  • Small throws for lounging on the sofa
  • Bed quilts, especially for the hospitalized to bring to colour to the room
  • Padded cases for eyeglasses
  • Thick quilted “pot” holders to be used for hot OR cold items (my hands can’t handle taking things out of the freezer, for instance)

Sewing

  • All kinds of warmers made with grains/rice inside of fabric that can be microwaved; these can be shaped for certain body parts or square for a generic heating pad
  • Nice pillows to put said warmers into, or just in general
  • Fleece hats
  • Extra-warm Mittens
  • Bed jackets and shrugs
  • Bags and totes for carrying things to appointments
  • Bags, “backpacks” and other items to add storage space to a rollator or wheelchair
  • “Slanket”/”Snuggie” type throws
  • Cute animals to cuddle up with — yes even adults like to sleep with a friend sometimes! — ideally very soft as well

Knit/Crochet

  • Lap blankets for wheelchair users (see above)
  • Throws for lounging
  • Shrugs and cardigans for those who get cold easily
  • Gloves, mittens or fingerless versions thereof
  • Wrist, arm, legwarmers
  • Hats, especially soft ones that are washable but don’t have bulky brims (for those of us who have to sleep in hats a bump at the brim can be uncomfortable)
  • Handmade socks
  • Prayer square where appropriate
  • Cute, soft animals (see above)

Toiletriescheck with the person first for allergies/sensitivities!!

  • Lotions for those with skin problems
  • Unscented items for people allergic to perfumes
  • Exfoliating items for people who can’t bathe/shower every single day (dead skin can build up quickly)
  • Aromatherapy blends for relaxation, stress reduction, mental clarity, etc.
  • Bath blends without harsh chemicals; salts are usually good for this
  • Massage oils safe for use on the temples and forehead or warming or cooling ones for the body

Beading

  • Bookmarks
  • Stretchy jewelry for people who have trouble with hooks and clasps
  • Pretty, sparkly things for women who may be feeling unfeminine b/c of illness or side effects of treatment
  • Prayer beads where appropriate
  • Tiaras to make them the Queen of their Domain 🙂
  • Medic alert IDs — make the medic sign very visible
  • Awareness jewelry relating to their specific disease(s)

This is really a small sample of things that can be made, and things I plan to make for others.  Watch this space for more ideas in the weeks to come, and of course feel free to ask any questions about the items listed or to make suggestions of your own!

Stencils for beginners

iHanna does some of the most amazing things at her blog, you should seriously check it out!  One of the things she has turned me on to are the myriad of challenges around various crafty sites.  I decided to start the Green Pepper Press Crusades which are monthly challenges in various paper-crafting techniques. April’s challenge was cutting your own stencils.  (I want to note that I did technically do this in April, but the deadline for posting was extended to May 7 so I’m on time anyway 🙂 )

The tutorial Michelle Ward posted on the Crusade site is very good and if you are interested in making your own stencils I suggest you go read it now and come back here later 🙂  I do not have a burner tool so I just had to make do with craft knives.

The first step is to decide what you want your stencil to be.  Michelle noted that it’s handy if you can cut the stencil all in one cut so that you will have both a stencil (piece of plastic with a bit cut out of it) and a mask (cut-out shape that stands on its own).  There are good reasons for wanting both to work together, but this post is going to be too long already so I won’t go into them.

I decided that I wanted to start with a letter “J” (for Juliann, of course!).  I scouted around my large collection of fonts and found very many suitable ones but really wanted to draw my own so I doodled a little and came up with a letter similar to my actual handwriting but with clean lines so it would be a little easier to cut. Then on a whim I also doodled with the letters “tsc” (for “The Sick Chick”) and was surprised when I came up with a design I liked for that, too.

Next, I drew out these designs in a larger size onto the backs of used envelopes.  I ideally want something small enough to use for ATCs but figured that a larger size would be easier for this novice cutter.  (As it turns out I think the J will fit on ATCs but only just.)

[You can click on any image for the full sized version.]

So here are my initial doodles, the larger designs drawn in marker, and more supplies for making stencils:
Designs

Cutting the Stencils and Masks

Next I taped things to the cutting mat to help steady them.  First I taped the paper template, then I taped the plastic down over it.  This helped a little but things were still a bit wobbly and the masking tape didn’t hold stuck through the whole process.  Still it was better than nothing.

Taped Up 2 Taped up, ready to cut

Taking a craft knife (Exacto, scalpel, whatever you have), carefully cut around the outlines *without picking up the knife*. I used a very small mat that I had gotten free from a magazine so I was able to turn the whole thing around any time I needed to change direction which made things a lot easier.  If you do wind up lifting the knife, try to start cutting again as smoothly as possible.  You can always go back and clean up joins later but this is a little hard (and you have to do it on both stencil and mask). Unfortunately, I didn’t think to photograph this stage as visually it was pretty boring and I was too busy trying to keep my knife firmly planted.

Using the Stencils and Masks

I used rubber cement to hold the stencil down as there we lots of little fiddly bits that wouldn’t stay in place just by taping the outside.  You can rub off the rubber cement later after the paint has dried.

 A little help from rubber cement

So  here are a series of me painting the stencils and masks…

Starting to paint Fully covered
Stencil and Mask Starting to paint the mask
Mask fully painted
The other Design Other Design in Paint

The Finished Products

The big reveal Reveal 2

That’s just what they look like solo, I hope to make some art projects soon to incorporate them into.

I have enjoyed my first Crusade with the GPP Street Team and hope to be able to be involved in more projects in the future!